
Star trails are an extremely fun beginners way to get into astrophotography. No expensive star tracking systems are needed, no special equipment. All you’ll need is a film camera with a decent aperture setting (I always recommend the widest aperture you can use), a tripod, and an ability to use a cable release. With those requirements met, you’ll be shooting awesome star trail images in no time!

Drakes Beach. Graflex Speed Graphic 4x5 Camera and 178mm Kodak Aero Ektar Lens.
60 Minutes at f/2.5 on Ilford HP5.
Some things to take into consideration when aiming to get the most trails in your images are
1) How much ambient light is there. Even a town that’s 20 minutes away, can illuminate moisture in the atmosphere and cause light pollution in your photograph.
2) Focusing at infinity. When the view is dim in your viewfinder, simply point your camera at the brightest star you can find and try to “rack” the focus back and forth until you find the point where that bright star takes a defined pinpoint in your viewfinder.
3) Aperture. My recommendation is to shoot wide open for the most trails in your images. You’ll see in the image below, that there’s less trails than in the image above. It was shot (wide open) with a lens that has a maximum aperture of f/5.6. That’s not quite enough to render as many stars as an f/2.8 lens. An f/1.8 lens would have yielded even more stars and hence, more defined trails.
4) Timing. The more time… The more trails. Base the amount of time on how much ambient lighting there is. As a base line, I always assume I’ll be doing at least 45 minutes but my best star trails are anywhere from 60-90 minutes, occasionally longer.

Tehachapi. Graflex Speed Graphic / Fujinon 125mm f/5.6. Kodak Ektar 100 @ f/5.6 for 105 minutes.
This photo brings me to my next point. Your foreground can be illuminated easily by painting on light with a flashlight. This particular scenario was that a sheriff rolled up and pointed his spotlight at the tree. I ran over to speak with the officer and he kept looking at me like I was crazy as I pleaded with him to PLEASE turn his lights off… After about 5 minutes of back and forth, he finally turned his lights off. In this instance, it actually worked in my benefit aside from a little bit of blow out on the tree and rocks below, it generally lit up the tree in a pleasing way. In the image below of some star trails at Coleman beach, or the image below that of star trails at the Point Reyes Shipwreck… You’ll see that the beach foreground, or the boat… likely would have been rendered nearly black if I hadn’t used my flashlight to illuminate the foreground subject. Just be very cautious to not point the light too intensely or for too long on any given area. This method of painting light has been used for years by photographers and works extremely well in dimly lit situations where you need more than just a pinpoint light source. Just remember to keep moving the light around and be cautious of the amount of time that you paint the light onto your foreground.

Coleman Beach. Graflex Speed Graphic / 178mm Kodak Aero Ektar. 80 Minutes @ f/2.5 on Kodak E100.
Light painted on the foreground using the flashlight from my iPhone, with the light beam tightened by shining through my fingers so I could very precisely choose where I painted it on the foreground. Likely could have done it more but live and learn right? :) The blue light on the left of the image is from a boat in the distance that appeared about 45 minutes into the exposure.

Point Reyes Shipwreck. Olympus OM1-N / 50mm f/1.8. 80 Minutes @ f/2.8 on Fujifilm Velvia.
Light painted with a flashlight all over the boat and some red light from my red headlamp.

Tehachapi. Mamiya RB67 / 90mm f/3.8. 45 minutes @ f/3.8 on Portra 160VC.
This image was illuminated by cars driving up a winding road along with some internal lights on the building. Thats why I opted for just a 45 minute exposure but at the end, was very pleased with the results.

Tehachapi. Mamiya RB67 / 90mm f/3.8. 45 Minutes @ f/3.8. Cinestill 800T.
This shot was also illuminated by cars passing by and so there’s some blow out on the tree but I found it quite pleasant and the tungsten based film by Cinestill, rendered the sky a little more blue than in other star trails I’ve done.
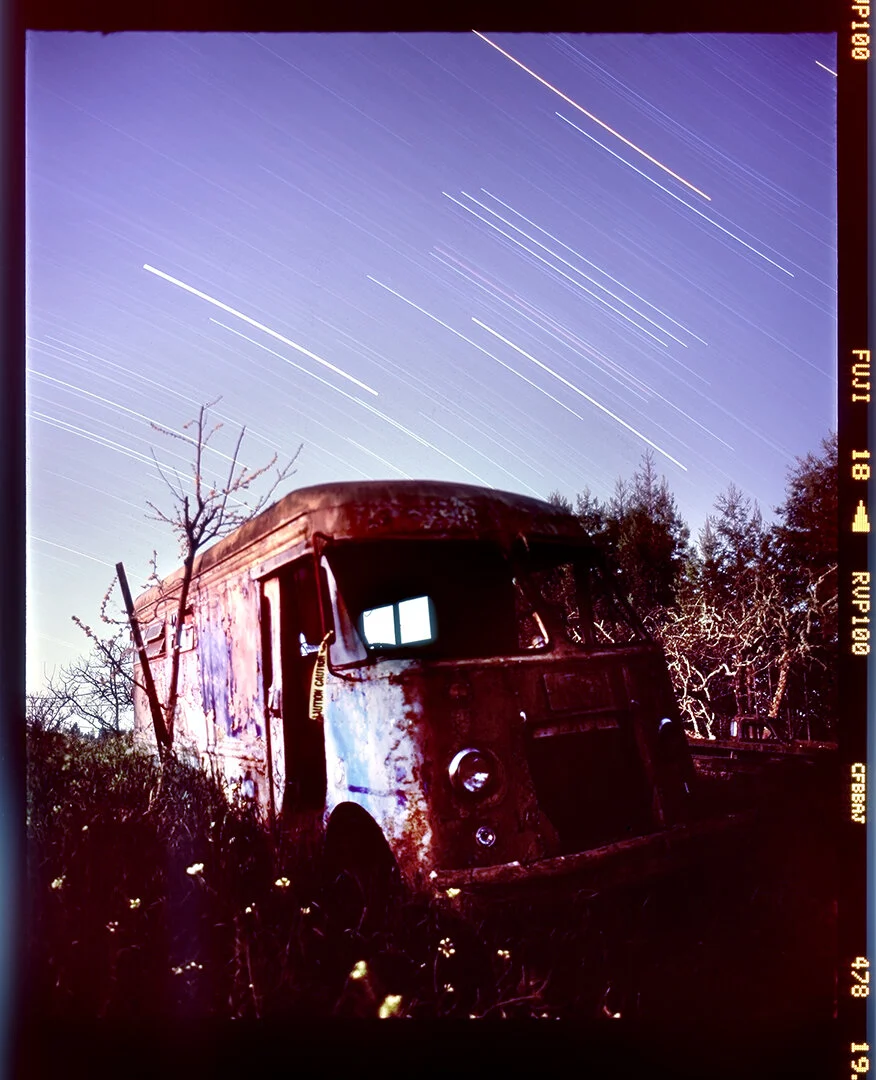
Sebastopol. Mamiya RB67 / 50mm f/4.5. 60 Minutes @ f/4.5 on Fujifilm Velvia.
This particular star trail was very tough to scan and had too much light on the left side of the abandoned truck, and not enough on the front. The best way to learn what these films / cameras can and CANT do…. is to go out and have fun!
And for even more fun… Some cameras will allow for use of instant film! Below are 2 shots taken on Fujifilm FP3000B and Fujifilm Instax Mini.

Coleman Beach. Graflex RB Super D. Zeiss Tessar 210mm f/3.5. 80 Minutes at F/3.5 on Fujifilm FP3000B
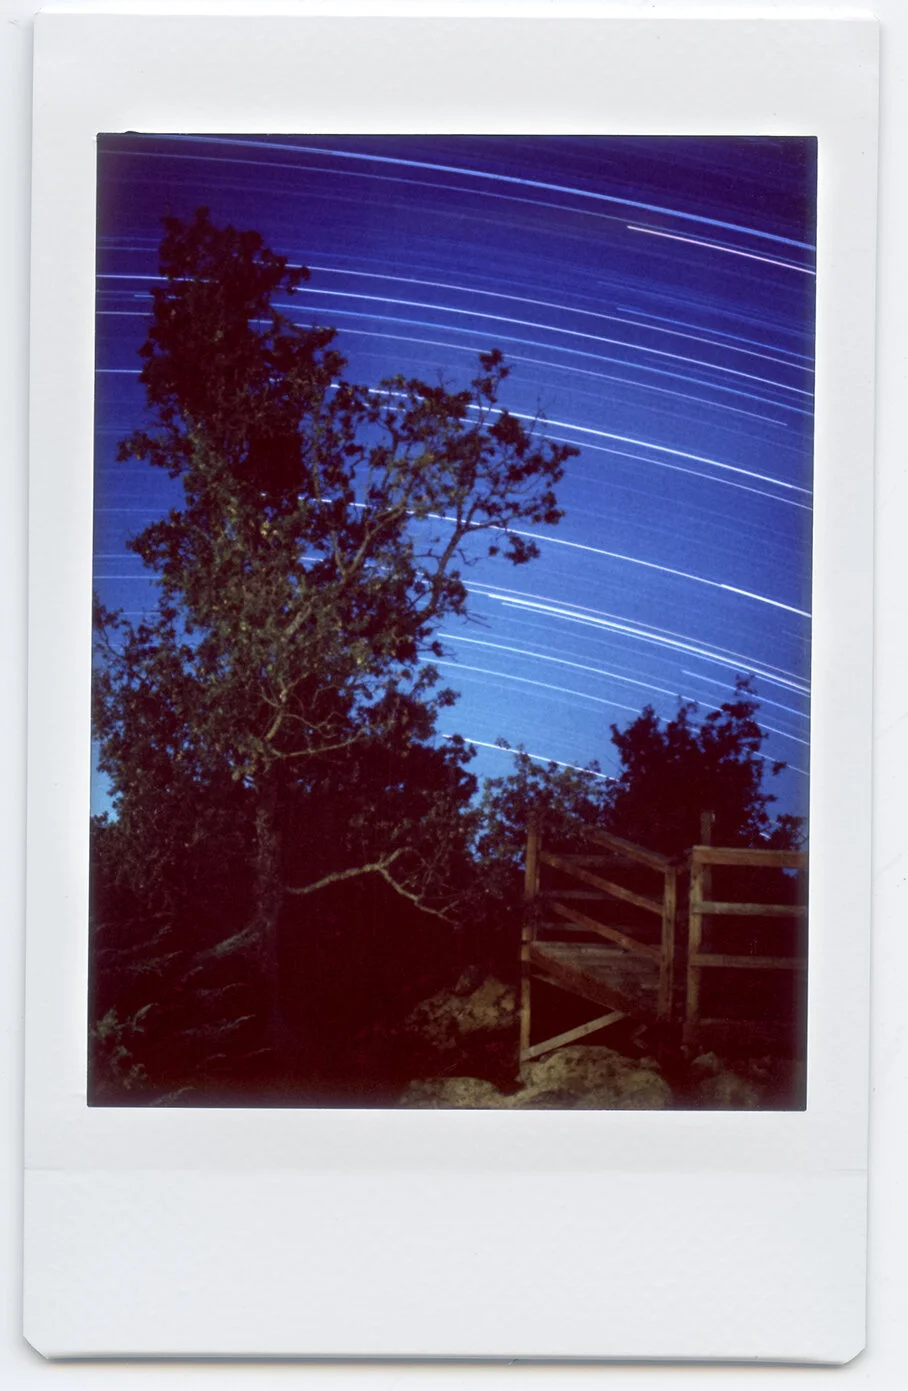
Tehachapi. Mamiya RB67 / 90mm f/3.8. 119 minutes @ f/3.8 on Fujifilm Instax Mini Instant Film.

Tehachapi. Mamiya RB67 / 90mm f/3.8. 119 Minutes @ f/3.8 on Kodak Portra 160. You’ll see here that the Fujifilm install suffered from much worse reciprocity failure than the Kodak Portra negative film or really any of the other films I’ve done star trails on.

Tehachapi Group Astrophotography Nights!. Mamiya RB67 / 90mm f/3.8. 28 minutes at F/3.8.
Kodak Portra 800. You can see the shorter exposure still yielded some trails and was necessary given the amount of extra light we used along with some flash pops. This night was mostly just doing digital photographs of the Milky Way but it was really fun seeing that the Milky Way was slightly visible in this shot.

Tehachapi. Mamiya RB67 / 50mm f/4.5. 105 minutes @ f/4.5 on Kodak Ektar 100.
This will be the last exposure for this blog post. It was shot without adding any extra light so you can see the tree and foreground are quite dark… but there’s something about the silhouetted look that I really liked. And at the end of the day, there’s really no right or wrong way to do these. Following some of the suggestions I’ve given here, you can depart on your own journey to find what YOU like and what works for you. I’ve seen some pretty rad star trails come from cameras I would least expect like a Diana Mini, and I’m sure that many more things are possible! Go out and have fun, find what works for you! Below is a quick youtube video I made to showcase these methods as well. Experimentation is key here, and again… HAVING FUN!
Happy Shooting Ya’ll!!!