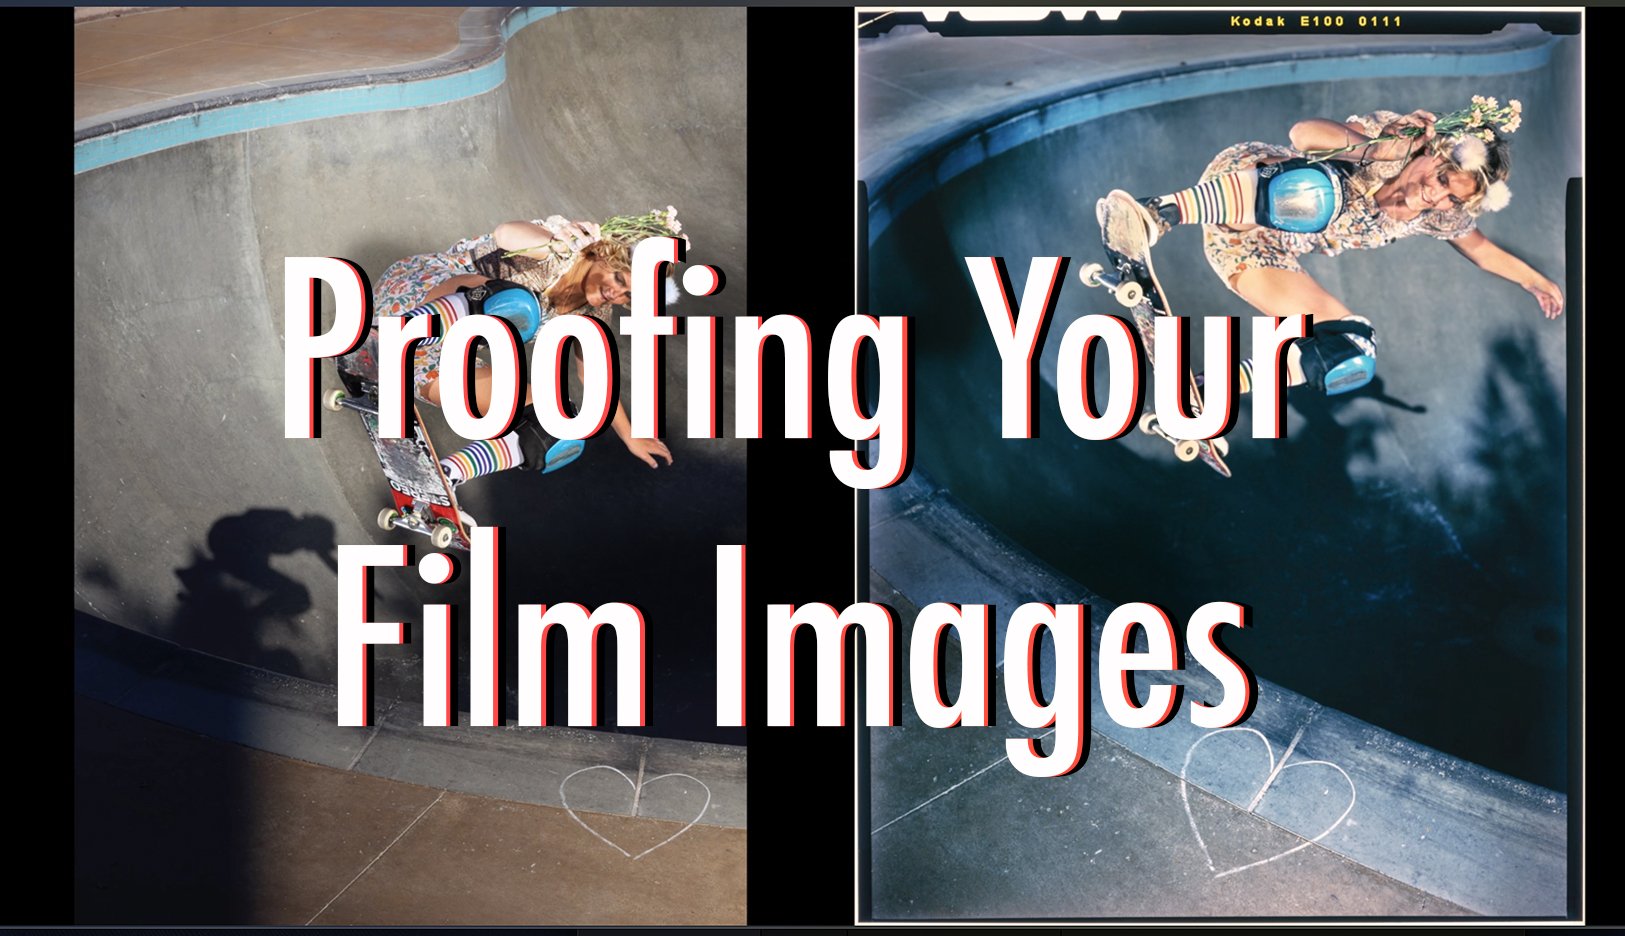
Proofing your Film Images. Why I do it.. THE DIGI-ROID!

In this article, I’ll be discussing the idea of taking digital test shots to serve as a proof of your film images. Whether you’re shooting 110, 35mm, 120, 4x5, 8x10, or larger… this technique can help you get the most out of your film photography.

In commercial photography of the past, back when film was still used… polaroid was an indispensable tool. Saved tons of money for clients and allowed to preview what your image would look like when you got it back from the lab.

These days, the polaroid (and fujifilm) instant film for these methods doesn’t exist anymore. My favorite to use was FP-100c for proofing and found it to be an extremely inspiring way to work. And while fujifilm instax exists, its not really ideal for proofing since there aren’t readily available film backs that maintain the same film plane as the conventional film. Really enjoy using my Lomograflok instax wide back for my 4x5 camera… but the film plane difference, makes me prefer the method we’re about to discuss…. THE DIGI-ROID!

The concept is simple. If you have a digital camera, set the ISO to the same as your film speed… and take a test shot. It’s truly as easy as that!

With this said… It does take some getting used to and you’ll want to test things out. For instance, I’ve found Kodak Portra 160 to be best when I set my Canon 6D to ISO 100. For Kodak Ektachrome, ISO 50 (or ISO 50L) has worked the best, despite the ISO 100 rating of that film. You’ll want to do your own testing, since each digital camera will be slightly different. You can also go as far as to make a custom picture style (or color profile) with your digital camera, to allow for the most accurate proofing of your film images.

This method is incredibly useful for those who enjoy using flash for their images. When working with off camera lighting, a light meter can only provide you with what settings to use. It cannot give you a proof image of what your light will actually look like when it hits your subject. I’ve often times found, that my subject gets really excited for the proof images, and gives it their all when it comes to the film.

Worth mentioning that, for those using a leaf shutter camera… you’ll sometimes need to exceed your sync speed on your focal plane shutter digital camera. For those instances, I just put my subject into the area that IS illuminated by my flash, and ignore the area that is darkened from the focal plane shutter cutting off the light.

There’s really no set answer I could give you in regards to what ISO on your digital camera, will match the film stocks you shoot. Best method for testing would be to shoot the same images (with the same aperture / shutter speed ) on your digital camera, setting different ISO ratings… and find which matches up to the film images you get with different film stocks that you regularly shoot.

Below are some examples of this method. All digital images are shot with a Canon 6D, and the film images vary… but are typically shot with a Graflex Speed Graphic or Canon EOS 1N.

For More info, check out the youtube video below

Shooting Star Trails on Film - A beginners guide to basic Astrophotography

Star trails are an extremely fun beginners way to get into astrophotography. No expensive star tracking systems are needed, no special equipment. All you’ll need is a film camera with a decent aperture setting (I always recommend the widest aperture you can use), a tripod, and an ability to use a cable release. With those requirements met, you’ll be shooting awesome star trail images in no time!

Feb13_DrakesBeachStars.jpg

Drakes Beach. Graflex Speed Graphic 4x5 Camera and 178mm Kodak Aero Ektar Lens.

60 Minutes at f/2.5 on Ilford HP5.


Some things to take into consideration when aiming to get the most trails in your images are

1) How much ambient light is there. Even a town that’s 20 minutes away, can illuminate moisture in the atmosphere and cause light pollution in your photograph.

2) Focusing at infinity. When the view is dim in your viewfinder, simply point your camera at the brightest star you can find and try to “rack” the focus back and forth until you find the point where that bright star takes a defined pinpoint in your viewfinder.

3) Aperture. My recommendation is to shoot wide open for the most trails in your images. You’ll see in the image below, that there’s less trails than in the image above. It was shot (wide open) with a lens that has a maximum aperture of f/5.6. That’s not quite enough to render as many stars as an f/2.8 lens. An f/1.8 lens would have yielded even more stars and hence, more defined trails.

4) Timing. The more time… The more trails. Base the amount of time on how much ambient lighting there is. As a base line, I always assume I’ll be doing at least 45 minutes but my best star trails are anywhere from 60-90 minutes, occasionally longer.

WoodWard_StarTrail4x5June.jpg

Tehachapi. Graflex Speed Graphic / Fujinon 125mm f/5.6. Kodak Ektar 100 @ f/5.6 for 105 minutes.


This photo brings me to my next point. Your foreground can be illuminated easily by painting on light with a flashlight. This particular scenario was that a sheriff rolled up and pointed his spotlight at the tree. I ran over to speak with the officer and he kept looking at me like I was crazy as I pleaded with him to PLEASE turn his lights off… After about 5 minutes of back and forth, he finally turned his lights off. In this instance, it actually worked in my benefit aside from a little bit of blow out on the tree and rocks below, it generally lit up the tree in a pleasing way. In the image below of some star trails at Coleman beach, or the image below that of star trails at the Point Reyes Shipwreck… You’ll see that the beach foreground, or the boat… likely would have been rendered nearly black if I hadn’t used my flashlight to illuminate the foreground subject. Just be very cautious to not point the light too intensely or for too long on any given area. This method of painting light has been used for years by photographers and works extremely well in dimly lit situations where you need more than just a pinpoint light source. Just remember to keep moving the light around and be cautious of the amount of time that you paint the light onto your foreground.

ColemanBeachVenusStarTrailEktaMarch20WEB.jpg

Coleman Beach. Graflex Speed Graphic / 178mm Kodak Aero Ektar. 80 Minutes @ f/2.5 on Kodak E100.

Light painted on the foreground using the flashlight from my iPhone, with the light beam tightened by shining through my fingers so I could very precisely choose where I painted it on the foreground. Likely could have done it more but live and learn right? :) The blue light on the left of the image is from a boat in the distance that appeared about 45 minutes into the exposure.

PointReyesShipwreckStarTrail_35mmWEB.jpg

Point Reyes Shipwreck. Olympus OM1-N / 50mm f/1.8. 80 Minutes @ f/2.8 on Fujifilm Velvia.

Light painted with a flashlight all over the boat and some red light from my red headlamp.

Woodward_StarTrail1_PortraVC.jpg

Tehachapi. Mamiya RB67 / 90mm f/3.8. 45 minutes @ f/3.8 on Portra 160VC.

This image was illuminated by cars driving up a winding road along with some internal lights on the building. Thats why I opted for just a 45 minute exposure but at the end, was very pleased with the results.

woodward_startrails45min_cinestillWEB.jpg

Tehachapi. Mamiya RB67 / 90mm f/3.8. 45 Minutes @ f/3.8. Cinestill 800T.

This shot was also illuminated by cars passing by and so there’s some blow out on the tree but I found it quite pleasant and the tungsten based film by Cinestill, rendered the sky a little more blue than in other star trails I’ve done.

startrailsvelvia_mar_4th_notfullyretouchedWEB.jpg

Sebastopol. Mamiya RB67 / 50mm f/4.5. 60 Minutes @ f/4.5 on Fujifilm Velvia.

This particular star trail was very tough to scan and had too much light on the left side of the abandoned truck, and not enough on the front. The best way to learn what these films / cameras can and CANT do…. is to go out and have fun!

And for even more fun… Some cameras will allow for use of instant film! Below are 2 shots taken on Fujifilm FP3000B and Fujifilm Instax Mini.

ColemanBeachVenusStarTrailfp3000bMarch20WEB.jpg

Coleman Beach. Graflex RB Super D. Zeiss Tessar 210mm f/3.5. 80 Minutes at F/3.5 on Fujifilm FP3000B

woodward8_instaxtrailsWEB.jpg

Tehachapi. Mamiya RB67 / 90mm f/3.8. 119 minutes @ f/3.8 on Fujifilm Instax Mini Instant Film.

Woodward8_Portra119minutesWEB.jpg

Tehachapi. Mamiya RB67 / 90mm f/3.8. 119 Minutes @ f/3.8 on Kodak Portra 160. You’ll see here that the Fujifilm install suffered from much worse reciprocity failure than the Kodak Portra negative film or really any of the other films I’ve done star trails on.

Woodward8_Group_28minutesWEB.jpg

Tehachapi Group Astrophotography Nights!. Mamiya RB67 / 90mm f/3.8. 28 minutes at F/3.8.

Kodak Portra 800. You can see the shorter exposure still yielded some trails and was necessary given the amount of extra light we used along with some flash pops. This night was mostly just doing digital photographs of the Milky Way but it was really fun seeing that the Milky Way was slightly visible in this shot.

Woodward8_Ektar105minutesWEB.jpg

Tehachapi. Mamiya RB67 / 50mm f/4.5. 105 minutes @ f/4.5 on Kodak Ektar 100.

This will be the last exposure for this blog post. It was shot without adding any extra light so you can see the tree and foreground are quite dark… but there’s something about the silhouetted look that I really liked. And at the end of the day, there’s really no right or wrong way to do these. Following some of the suggestions I’ve given here, you can depart on your own journey to find what YOU like and what works for you. I’ve seen some pretty rad star trails come from cameras I would least expect like a Diana Mini, and I’m sure that many more things are possible! Go out and have fun, find what works for you! Below is a quick youtube video I made to showcase these methods as well. Experimentation is key here, and again… HAVING FUN!

Happy Shooting Ya’ll!!!

www.davesrollans.com/blog

Epson Flatbed Scanning VS DSLR Camera Scanning

Ever thought, “These flatbed scans are ok…. but shouldn’t I be getting more from my film?”

I certainly had this thought and couldn’t stand the lengthy process of scanning film on my Epson V550 and V800 scanners. It’s not to say I wasn’t able to get some decent scans and prints from these scanners, but the amount of time in physically scanning along with post processing… led me to find a better method. DSLR / Mirrorless Camera Scanning!

I’m using a Canon 5DSr with a 100mm f/2.8 macro lens and my light source is a Paul C Buff Einstein flash. All of this is mounted in a copy stand that I cut a 12”x12” hole in the bottom of. Using two pieces of plexiglass, I’m able to achieve double diffusion for a very even light source. The Eintein 640ws flash unit has a color consistency mode and I’ve found this to be an exceptional light source for a balance between color consistency and flash duration, ensuring sharp images with consistent color.

For keeping my negatives flat, I’m using Negative Supply products. Their innovated designs ensures extreme film flatness while keeping a very fast work flow. Highly recommend you check them out!

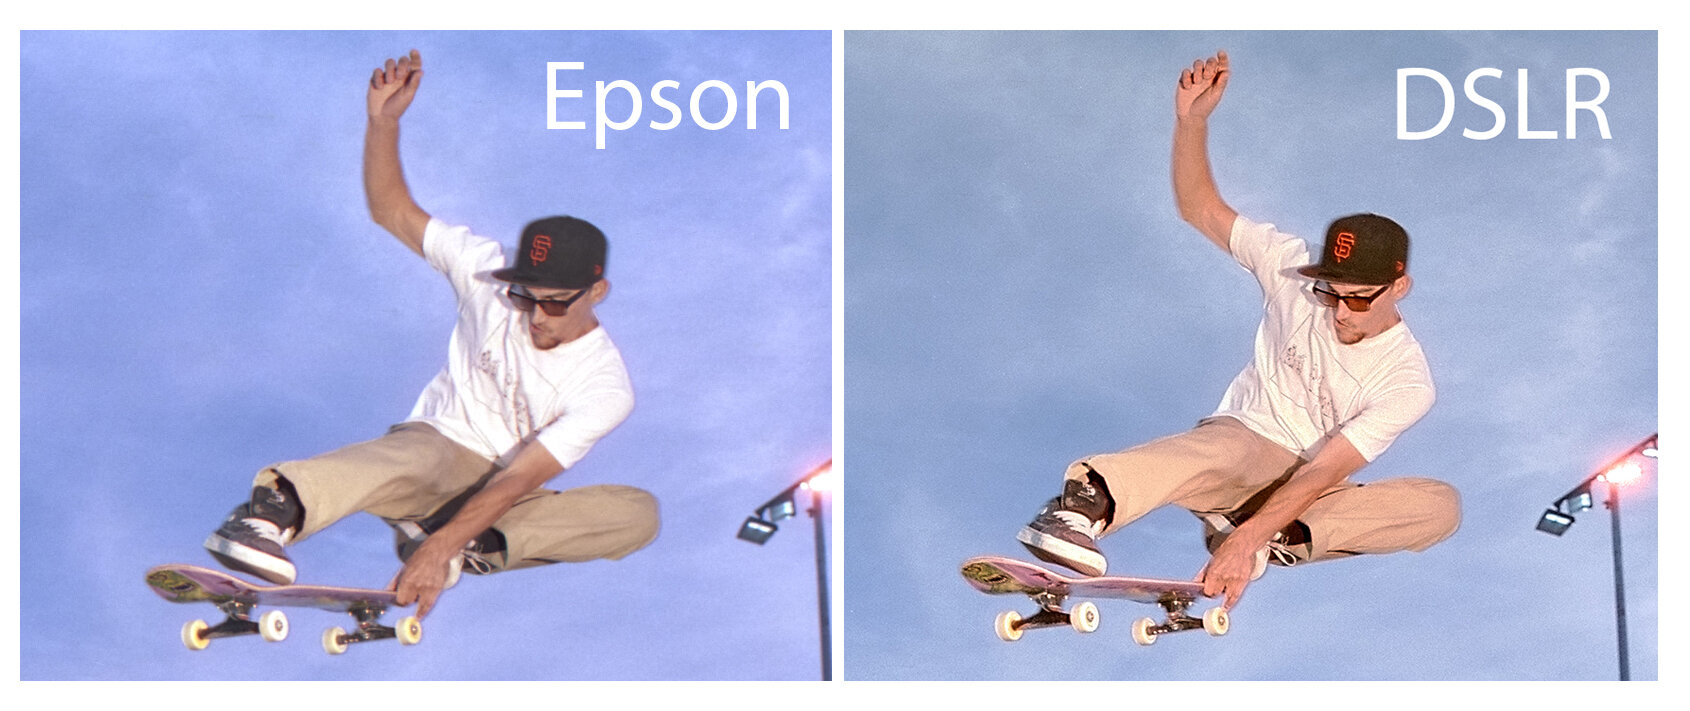
Below is an Epson scan, scanned at 2400dpi and then mildly post processed in Photoshop. It’s shot on Cinestill 800T, using a CTO gel on both of my flashes to maintain a proper color on the skateboarded while rendering the sunset vibe as very blue. But… there was something very “flat” feeling about the tonality.

mason_indy_cinestill_Blog.jpg

Now here’s the DSLR scan. To my eyes, the actual depth of the negative can be seen instead of this flat rendition of the negative.

MasonCinestillIndyRescan_Fix3_blogBigCrop.jpg

This was “scanned” (digitized) in a matter of seconds and required VERY little post processing to achieve an image I was happy with. Below are side by side crops of the two

EpsonvsDSLR.jpg

Thanks for checking out this quick blog post! Below are some images of the set up used to make the DSLR scans along with some more example images digitized using my DSLR set up. Happy shooting!!!

ChadBNapaSunset2019-2BLOG.jpg
EktachromeMayWalkFlowers-14BLOG.jpg
EmilySmokingJanuaryPortra-32BLOG.jpg
ShaylynJan18GoldGatePark-3BLOG.jpg
IMG_1805.jpg
IMG_1810.jpg
IMG_1813.jpg
IMG_1811.jpg

My YouTube Channel! Many Interviews and More!

My YouTube features everything from How To Videos on Developing Film at Home, Photoshop Tricks for editing your scanned images, and interviews with some majorly influential Photographers. Will Soon be adding more individual Blog posts on various topics but as my time is limited this month, this will have to do for now! Click the play button below to visit my youtube channel

YouTube Daves Film Lab

Jason Lee Film Photography and the Importance of Printing Images

www.davesfilmlab.com

www.davesfilmlab.com

Shooting Instax Wide Film in ANY 4x5 Camera - NO MODS!!!

How I'm shooting instax wide film with my 4x5 cameras

Hello photographic community!

Wanted to make this little guide for how to shoot Fujifilm Instax Wide film in any 4x5 camera without the need for modifications.

To do this, you’ll need a few things. First off, assuming you’ve already got a 4x5 camera / holders 😊

You’ll need a

1) Changing Bag

2) Instax Wide Camera and Film

3) Spare sheet of 4x5 Film and

4) Xacto Knife or Equivalent

Start by cutting 4 “photo corner” slits in your 4x5 sheet. You can use an instax shot that you’ve already taken to ensure its all lined up and fits properly.

Next, you’ll need to (in the changing bag) remove a sheet of instax film from the changing bag and load it into your 4x5 sheet that you’ve just cut.

Last step is to expose the Instax Wide film with your 4x5 camera. Make sure you meter for ISO 800 😎 and expose from the “non-photo” back side of the film. Then in a changing bag, remove the Instax film from the 4x5 holder and load it back into your pack of instax for processing, ensuring that the chemical pod is facing upwards. To process, you’ll simply cover the lens and fire a “blank” photo and BOOM! It will process the shot you just took with your 4x5 camera!

Some final thoughts are…

Use a 3 stop ND filter to bring your film speed down to 100 if need be. Also, be sure to take some practice shots using whatever metering method you like. Some people say its actually ISO 1000, others say its actually ISO 640…. What I’ll say is that all of this is dependent on HOW you METER your photos. Best thing to do is to take some test shots and calibrate it to YOUR workflow.

Happy Shooting!!!

6 Rolls of 35mm in Nashville

At the end of July, I had the pleasure of flying out to Nashville to document a recording session at Sputnik Sound with "The Maud". I Brough 3 video cameras but only one still camera... an Olympus OM1n with 21mm and 50mm lenses. 

The limitation of a single camera and 6 rolls of film was an absolute blast and made me fall even more in love with my Olympus. Below are some photographs from the trip shot on Kodak Tmax P3200, Fujifilm C200, and one roll of Cinestill 800T. 

Enjoy and stay tuned for my next blog post on how I process Color Negative and Color Slide film at Home!

How to process Black & White 35mm Film AT HOME!

For a while now I've wanted to make this blog post / video and its finally happening! 

Black and white film is extremely easy to process yourself at home. Not only will this save you time but also will save you a LOT of money in the long run. I've compiled a list of everything you'll need to process black and white film at home and all the equipment will work for color too, just requires different chemicals. 

Once you get past the initial cost... chemicals are cheap and drops your cost per roll as low as $1 per roll of film. Below you'll find a list of equipment needed which can be purchased online or for some, can be sourced locally. I'm located in the Bay Area and there are a few stores locally that carry these items including Seawood Photo in San Rafael and Jeremiahs Photo Corner in Santa Rosa. The prices below are based on items on www.freestylephoto.biz

You'll need 

- Paterson Super System 4 with 2 reels -$34.99 (or paterson 3 reel tank and reels) 

- Changing Bag - $23.99

- 50ml Graduated Cylinder - $4.99

- 1000ml Graduated Cylinder - $9.99

- 120ml Rodinal Developer - $9.39 (also goes by R09)

- 500ml Ilford Rapid Fixer - $8.49

- LFN Wetting Agent - $12.99

- Funnels - $6.00

- Bottle Opener (I'm assuming you have one)

This totals out to $110.83 

Add an Epson V550 scanner for $169.99 and you're totaling out $280.82

This set up (with a 2 reel tank and using 1:50 dilution of rodinal) will give you 24 rolls of film. 

Lets assume you get your film developed and scanned by a lab.... Most are around $12-$18 per roll of black and white (with scans). Thats $288 for 24 rolls processed at a lab.... For the same price you can buy the equipment to do it yourself! And after the initial investment, things only get cheaper! 

Here's a video on how to process 35mm black and white film at home. Stay tuned for my next video on color development where I'll be touching base on 35mm and 120 film (medium format).

Blog post can be found at www.daverollans.com